Environment
Reflection for HP version 13.0 through 14.x
Reflection for UNIX and OpenVMS version 13.0 through 14.x
Reflection for ReGIS Graphics version 13.0 through 14.x
Situation
This technical note describes how to generate a Reflection VT or HP session event trace to use for your own troubleshooting purposes or when working with a support engineer. An event trace captures communications activity between the PC and the host including keystrokes, commands, and menu and dialog box selections.
Resolution
Generating an Event Trace
When generating a Reflection VT or HP session event trace file, it is best to start one or two screens before your problem occurs. Additionally, it may be helpful to record your login results.
To keep your user name and password secure, start the trace just after you enter the password, but right before you press Enter to log on. Login results will be recorded, but your user name and password will not.
To capture events to a file:
- Start the trace.
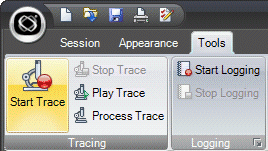
In Reflection 2008: On the Tools tab, click Start Trace.
In Reflection 13.0 - 14.x: Click Connection > Trace > Start Trace.
- In the Start Trace dialog box (Save Trace Events in version 13.0 - 14.x), specify a name for the trace event file.
Tip: If you already have spoken with a support technician, use your Service Request number as the name of your event trace file.
- Click Save. A bug icon appears in the Reflection status bar.
- Perform the actions that illustrate the problem you want recorded in the event file.
- Stop the trace.
In Reflection 2008: On the Tools tab, click Stop Trace.
In Reflection 13.0 - 14.x: Click Connection > Trace > Stop Trace.
Creating an Event Trace Report
Once you have captured the events leading up to a problem, you can print a report of the event trace to either a printer or a disk. You then can study this report and perhaps resolve the problem yourself.
If you are unable to resolve the problem yourself, proceed to the next section for instructions on sending the event trace report to Technical Support.
To create an event trace report:
- Process the trace.
In Reflection 2008: On the Tools tab, click Process Trace.
In Reflection 13.0 - 14.x: Click Connection > Trace > Process Trace.
- In the Process Event Trace dialog box, select Generate report. Verify that Traditional is selected as the String syntax. Click OK.
- In the Open Events dialog box, select the event trace file you want to associate with the report. Click Open.
- Specify a name for the event trace report file, and then click Save.
By default, the report is saved with a .txt file extension.
To view the event trace report, open it in a text editor, such as Notepad.
If you are already working with Technical Support, see the instructions at https://support.microfocus.com/kb/doc.php?id=7024990 on how to upload any files gathered. If you experience issues with getting the FTS credentials from the Support Portal, contact your Support Engineer who can assist and provide the URL, username, and password for the upload.